


Tutorial: Purple Gradient Nails
After many attempts, I have finally created a look for my nails that veers away from my usual boring one-color nails. (First time, yey!) This is just a simple gradient look for your nails. Today's color: purple.

There are different ways on how to create gradient nails but here's what I did. (It's the easiest way, I think.) I used three shades of purple nail polish from the Bobbie Premium Nail Creme Glaze line to create the gradient effect for this tutorial but of course you can use any other colors that you want. (Click here to see what nail polishes I used.)
1. Apply base coat of your choice. This is done to protect your nails and prevent them from being stained.
2. Apply base polish all over the nail. I used the one with the lightest purple shade (Purple Passion). Let nails dry completely before proceeding to the next step. To check whether or not my nails are dry, I lightly touch my nails with the back of my other hand. If there's no more squeaky feeling, then my nails are dry and ready for the next coat of polish.

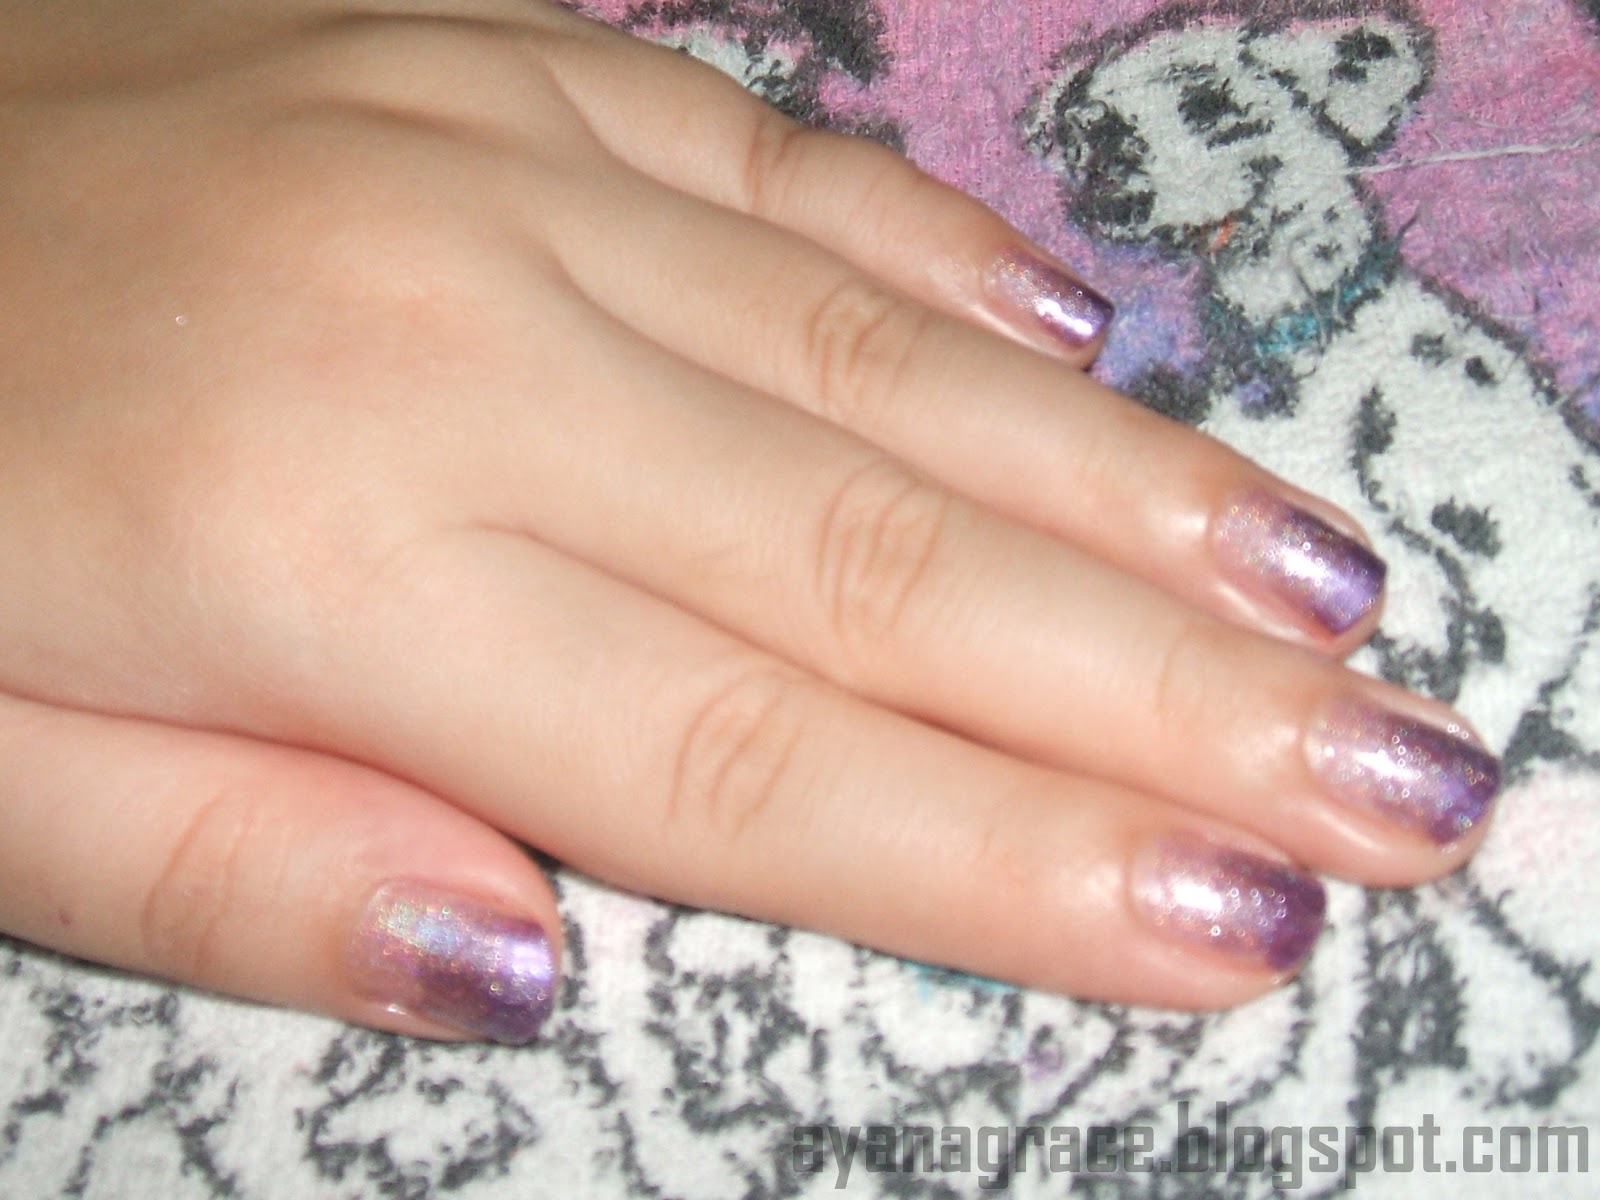
2. Apply darker colored polish (Garland) to the upper portion of the nail, covering just about half to two-thirds of the nail. Remember, you're going for a gradient effect so there's no need to be perfect about this step. Let dry.

3. Apply darkest color (Parasail) to the topmost portion of the nail. Simply put, create a "thick" French tip using the darkest color. Build up to your desired darkness. Let dry.

4. To soften the harsh edges, apply glitter nail polish all over the nail or you may choose to apply it only on the top portion. At this point, you may also decorate your nails with whatever art you like. It's your call. :)
5. Finish off with a layer of the top coat of your choice to protect your design and make it last.
There you have it... an easy step-by-step guide to create a gradient look for your nails. Hope you find this post helpful! :D
So pretty~ <3 Definitely have to try this sometime.
ReplyDeleteOk ba yung Bobbie nail polish? I've tried a few (dati pa) and I found that they take forever to dry so I stopped buying them. It's a pity because the colors are so nice pa naman. Maybe I should try using them again.
@strangevision: Hi Ma'am Carmi, sakin naman po mabilis magdry :) Maybe they changed the formula. Hehehe
ReplyDeleteWow! I never knew one could put so much time in such elaborate activities. And that's just for nails! I wish I could have the time to do just beyond the usual nail cutting (and nail filing, of course). But then again, maybe it's just a matter of proper time management. But, that's another story... -Cream Puff
ReplyDeletePS @strangevision, Bobbie nail polish tends to chip easily on me though.
ReplyDelete@Cream Puff: Ha! Yeah, well, you know... I have all the time in the world right now O_O
i used to think gradient nail polish would take a lot of effort to do.. but now i know it's doable at home even for a beginner like me ;) will follow your blog now :D
ReplyDelete@Hazel, thank you! There are lots of other easy techniques for gradient nails but I'm most comfortable with this one. :)
ReplyDelete